The Ultimate New Hire Paperwork Checklist: 8 Essential Forms for 2025
A smooth onboarding process sets the tone for a new employee's entire journey with your company, but the administrative tasks can quickly become overwhelming. The mountain of paperwork, if managed poorly, can lead to payroll errors, serious compliance risks, and a frustrating first-day experience for your new talent. Creating a seamless, organized workflow is critical for both Human Resources teams and the employees they support.
This comprehensive new hire paperwork checklist is designed to eliminate confusion and streamline your process from the very start. We will break down the 8 essential documents every employer and new hire must handle, detailing what each form is for, who is responsible for completing it, and common pitfalls to avoid.
From the mandatory Form I-9 and federal W-4 to setting up direct deposit and acknowledging company policies, this guide provides a clear, actionable roadmap. Consider this your definitive resource for building an efficient, compliant, and welcoming onboarding system. We will cover the specific requirements for each document to ensure you get everything right from day one, setting up your new team members for success. This structured approach helps prevent delays and ensures every legal and logistical box is checked.
1. I-9 Form (Employment Eligibility Verification)
The Form I-9 is the cornerstone of any compliant new hire paperwork checklist. Mandated by U.S. Citizenship and Immigration Services (USCIS), this federal form verifies both the identity and employment authorization of every new employee hired in the United States, regardless of their citizenship status. It is a critical compliance document that protects both the employer from legal penalties and the employee by confirming their right to work.
How It Works
The I-9 process is a two-part verification:
- Section 1: The employee completes this section on or before their first day of employment. They provide personal information and attest to their employment authorization status.
- Section 2: The employer must complete this section within three business days of the employee's first day. The HR representative or another authorized individual physically examines the employee's original, unexpired identity and work authorization documents and records the details on the form.
This strict timeline makes the I-9 a top priority during onboarding. Failure to complete it correctly and on time can result in significant fines.
Actionable Tips for I-9 Compliance
To ensure a smooth and compliant process, follow these best practices:
- Separate I-9 Files: Never store completed I-9 forms in an employee's general personnel file. Keep them in a separate, secure binder or digital folder to protect sensitive information and simplify audits.
- Embrace Digital Solutions: For remote hires, use an authorized E-Verify employer agent or digital I-9 service. These platforms facilitate compliant remote verification, a common challenge for distributed teams.
- Conduct Regular Audits: Perform an annual internal audit of your I-9 records. This proactive step helps you identify and correct errors, such as missing signatures or expired document information, before a government audit occurs.
- Train Your Team: Ensure anyone responsible for completing Section 2 is thoroughly trained on the list of acceptable documents and the rules against over-documentation or discrimination.
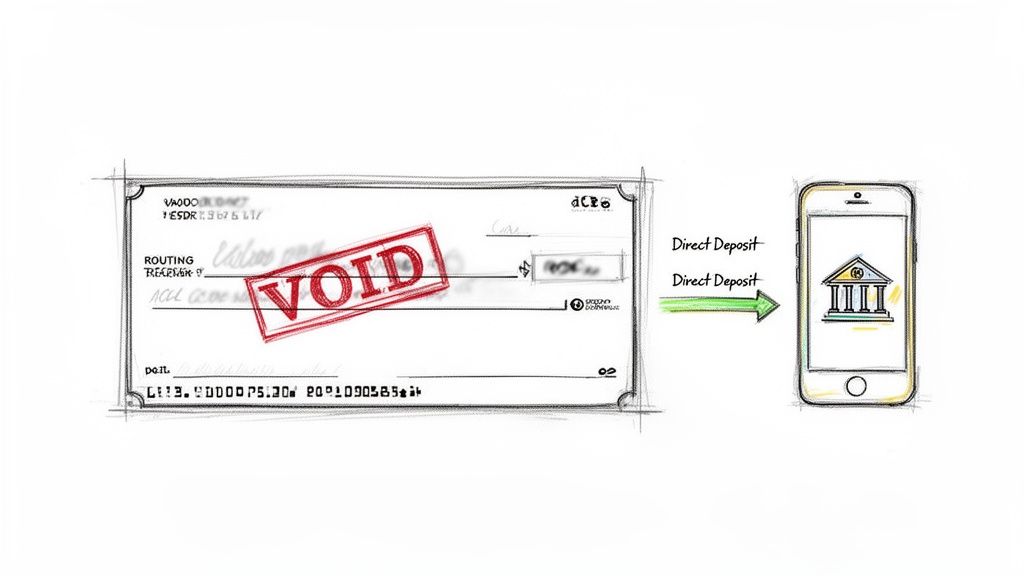
2. Direct Deposit Authorization Form (ACH Form)
The Direct Deposit Authorization Form, often called an ACH (Automated Clearing House) Form, is how a new employee grants your company permission to deposit their pay directly into their bank account. This document is a critical part of a modern new hire paperwork checklist, as it streamlines payroll, reduces administrative costs, and provides employees with faster, more reliable access to their earnings. It formalizes the banking relationship for payroll, expense reimbursements, and other payments.
How It Works
Completing this form is straightforward but requires precision to avoid payment delays. The process is a simple exchange of information:
- Employee Provides Details: The new hire fills out the form with their personal information, bank name, account type (checking or savings), and most importantly, the bank's routing number and their specific account number.
- Employer Sets Up Payroll: Your payroll or HR department uses this signed authorization to configure the employee's payment details within your payroll system, ensuring funds are sent to the correct account on payday.
Most modern payroll systems, like ADP or Workday, integrate this step directly into their digital onboarding flow for maximum efficiency.
Actionable Tips for Direct Deposit Setup
To guarantee a secure and error-free payroll setup, follow these best practices:
- Require Account Verification: Accept a voided check or a bank-provided direct deposit letter as the gold standard for verifying account details. This minimizes the risk of typos from manual data entry. For employees without checks, a tool like VoidedCheck.org can generate a compliant equivalent instantly.
- Validate Routing Numbers: Use a tool to validate the provided bank routing number against the Federal Reserve's database in real-time. Learn more about bank routing numbers for direct deposit.
- Provide Clear Instructions: Offer a visual guide showing employees exactly where to find the routing and account numbers on a check, as this is a common point of confusion.
- Retain Authorization Records: Securely store all signed Direct Deposit Authorization Forms for at least three years after an employee’s termination. These documents are essential for compliance and payroll audits.
3. I-9 Form (Employment Eligibility Verification)
The Form I-9 is the cornerstone of any compliant new hire paperwork checklist. Mandated by U.S. Citizenship and Immigration Services (USCIS), this federal form verifies both the identity and employment authorization of every new employee hired in the United States, regardless of their citizenship status. It is a critical compliance document that protects both the employer from legal penalties and the employee by confirming their right to work.
How It Works
The I-9 process is a two-part verification with a strict timeline:
- Section 1: The employee completes this section on or before their first day of employment. They provide personal information and attest to their employment authorization status under penalty of perjury.
- Section 2: The employer must complete this section within three business days of the employee's first day. An authorized representative physically examines the employee's original, unexpired identity and work authorization documents and records the details on the form.
This tight deadline makes the I-9 a top priority during onboarding. Failure to complete it correctly and on time can result in significant fines.
Actionable Tips for I-9 Compliance
To ensure a smooth and compliant process, follow these best practices:
- Separate I-9 Files: Never store completed I-9 forms in an employee's general personnel file. Keep them in a separate, secure binder or digital folder to protect sensitive information and simplify potential audits.
- Embrace Digital Solutions: For remote hires, use an authorized E-Verify employer agent or digital I-9 service. These platforms facilitate compliant remote verification, a common challenge for distributed teams.
- Conduct Regular Audits: Perform an annual internal audit of your I-9 records. This proactive step helps you identify and correct errors, such as missing signatures or expired document information, before a government audit occurs.
- Train Your Team: Ensure anyone responsible for completing Section 2 is thoroughly trained on the list of acceptable documents and the rules against over-documentation or discrimination.
4. W-9 Form (Contractor Tax Information)
While often associated with contractor onboarding rather than traditional new hires, the Form W-9 is a vital component of any comprehensive paperwork checklist, especially for companies utilizing a flexible workforce. This IRS form is used to request the Taxpayer Identification Number (TIN) of a U.S. person, including independent contractors, freelancers, and vendors. It certifies their tax status and ensures your business can correctly report payments made to them.
How It Works
The W-9 process is a straightforward but critical step for tax compliance when engaging non-employees:
- Part 1: The independent contractor or vendor completes the form before any payment is issued. They provide their name, business name (if applicable), address, and TIN (either a Social Security Number or Employer Identification Number).
- Part 2: The contractor signs and dates the form, certifying that the TIN provided is correct and that they are not subject to backup withholding. The hiring company then uses this information to issue a Form 1099-NEC at year-end if payments exceed the annual threshold.
This form is essential for distinguishing between employees (who complete a W-4) and contractors in your new hire paperwork checklist, preventing misclassification issues and ensuring proper tax reporting.
Actionable Tips for W-9 Compliance
To manage contractor information effectively and avoid IRS penalties, follow these best practices:
- Collect Before Paying: Make it a strict policy to obtain a completed and signed W-9 from every vendor and contractor before processing their first payment. This prevents year-end scrambles and compliance risks.
- Utilize a TIN Matching System: The IRS offers a free TIN Matching service. Use it to verify that the name and TIN on a submitted W-9 match IRS records, which helps avoid backup withholding requirements.
- Keep Contractor Files Separate: Just like I-9s, W-9s and contractor agreements should be stored separately from employee personnel files. This simplifies audits and protects sensitive information.
- Digitize the Process: Use accounting software like QuickBooks or dedicated onboarding platforms to send and collect digital W-9s. This streamlines the process, reduces errors, and creates a secure digital record.
5. State Tax Withholding Forms (State W-4 Equivalents)
Beyond the federal W-4, state tax withholding forms are a crucial component of any new hire paperwork checklist, ensuring payroll is compliant with state-specific regulations. These forms function as the state-level equivalent of the federal W-4, dictating the amount of state income tax withheld from an employee’s paycheck. Compliance is complex, as requirements vary dramatically from one state to another; some states have no income tax and require no form, while others have detailed, multi-page documents.
How It Works
The process for state withholding forms mirrors the federal W-4 but is dictated entirely by the employee's state of residence and/or work location.
- Employee Responsibility: The new hire completes the appropriate form for their state on or before their first day of work. They provide personal information and declare allowances or dependents to determine their withholding amount.
- Employer Responsibility: The HR or payroll team uses the information from the completed form to configure the employee's state tax deductions in the payroll system. This must be done before the first payroll run to ensure accurate tax withholding.
Incorrectly handling these forms can lead to payroll errors, employee dissatisfaction, and potential state tax penalties for the employer.
Actionable Tips for State Tax Form Compliance
To manage the complexity of state-by-state tax requirements, implement these best practices:
- Maintain a State-Specific Checklist: Create an internal resource that clearly lists which states require a withholding form. This prevents confusion for no-income-tax states like Texas or Florida.
- Use Smart Payroll Software: Modern payroll platforms like ADP or Workday often auto-populate the correct state form based on the employee's address, simplifying the process for multi-state employers.
- Clarify Work Location: For remote employees, it is critical to establish their primary work location during onboarding to determine which state’s tax laws apply. This is especially important for employees who may live in a different state than the company's office.
- Schedule Quarterly Reviews: Assign a team member to check the websites of relevant state revenue departments each quarter for updated forms and regulations. Forms like California's DE 4 are updated periodically.
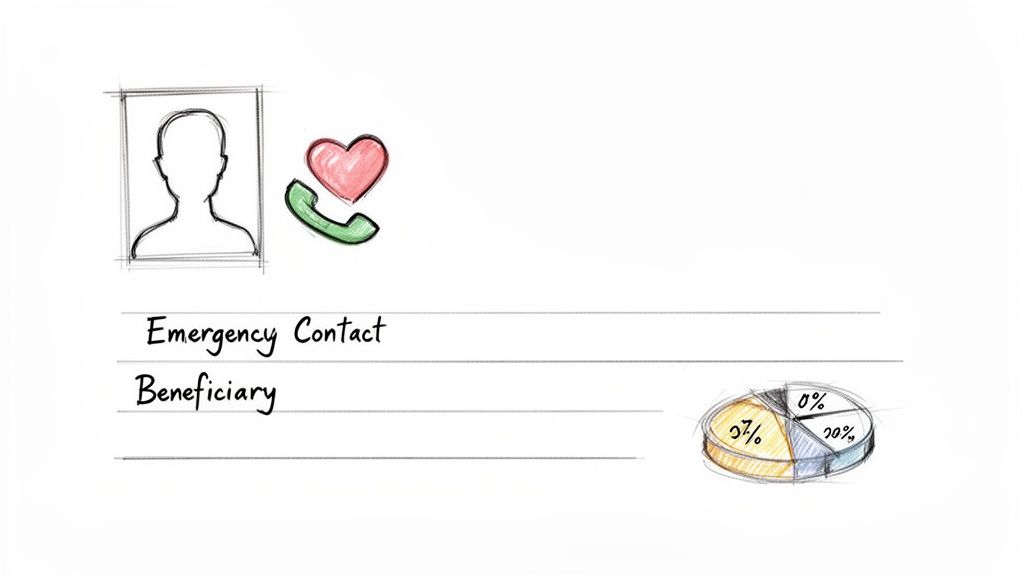
6. Emergency Contact and Beneficiary Forms
While not always legally mandated like an I-9, collecting emergency contact and beneficiary information is a crucial step in any comprehensive new hire paperwork checklist. These forms provide a vital lifeline in case of an on-the-job incident and ensure that employee benefits, such as life insurance or retirement funds, are distributed according to their wishes. Neglecting this step can create significant distress for an employee's family and potential liability for the company during a crisis.
How It Works
The process involves two distinct but related forms, which should be handled separately for clarity:
- Emergency Contact Form: The new hire provides names, phone numbers, and relationships for at least two individuals who should be notified in case of a medical emergency or accident at work. This is purely for safety and communication.
- Beneficiary Designation Form: The employee legally designates who will receive the payout from company-sponsored benefits, like a 401(k) or group life insurance policy, upon their death. This is a legally binding document managed by the benefits provider.
These forms should be collected during the initial onboarding week and stored securely, with beneficiary information often managed directly through a benefits administration portal.
Actionable Tips for Accuracy and Privacy
To manage this sensitive data effectively, implement these best practices:
- Explain the Difference Clearly: Many new hires confuse an emergency contact with a beneficiary. Explicitly train them that an emergency contact is for accidents, while a beneficiary is for financial assets after death. They do not have to be the same person.
- Request Multiple Contacts: Don't just ask for one emergency contact. Request a primary and a secondary contact in case the first person is unreachable.
- Schedule Annual Reminders: Life events like marriage, divorce, or birth necessitate updates. Send an annual automated reminder to all employees to review and update both their emergency contacts and beneficiary designations.
- Use Secure Digital Systems: Leverage your HRIS or benefits portal (like those from Workday, BambooHR, or Fidelity) to collect and store this information electronically. This ensures data is encrypted, access is controlled, and updates are easily tracked.
7. Bank Account Verification (Voided Check or Bank Statement)
A crucial step in any modern new hire paperwork checklist is verifying an employee's bank account information for direct deposit. This process ensures that payroll is sent to the correct account, preventing payment delays and administrative errors. Traditionally, this is done by collecting a physical voided check, but bank letters or statements are also common. Verification protects the employer from failed transactions and confirms the employee’s account details in compliance with ACH (Automated Clearing House) standards.
How It Works
This verification step is straightforward and directly linked to payroll setup:
- Employee Provides Proof: As part of their onboarding, the new hire submits a document that confirms their bank account details. This is typically a voided check, a direct deposit authorization form from their bank, or a recent bank statement with the account and routing numbers visible.
- HR Verifies and Enters Data: The HR or payroll administrator uses the document to confirm the employee's name, routing number, and account number. They then enter this verified information into the company's payroll system to activate direct deposit for the employee's first paycheck.
This simple check is essential for a smooth payroll process and gives both the employee and employer confidence that funds will be transferred correctly.
Actionable Tips for Bank Account Verification
To streamline this process and avoid common pitfalls, follow these best practices:
- Offer Digital Solutions: Many new hires, especially younger employees, do not have physical checkbooks. Provide a simple digital alternative. Services like VoidedCheck.org allow employees to generate a professional voided check online in minutes, which simplifies the process for everyone.
- Provide Clear Instructions: Specify that the account must be a checking or savings account and clearly state what information needs to be visible on the provided document. This helps prevent employees from submitting incorrect or incomplete information.
- Validate Routing Numbers: Use a free online tool or your payroll software's built-in feature to validate the routing number against the Federal Reserve E-Payments Routing Directory. This adds an extra layer of verification.
- Securely Store Documentation: Keep a high-resolution digital copy (PDF is ideal) of the verification document in a secure, access-controlled folder. This creates an essential audit trail for payroll compliance.
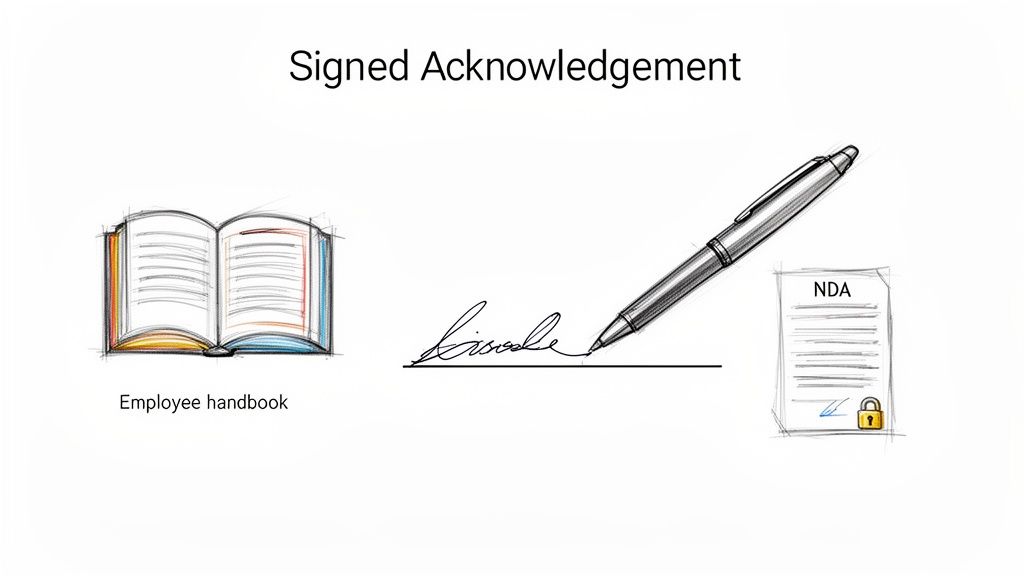
8. Signed Acknowledgment Forms (Handbook, Policy, NDA, Confidentiality Agreements)
Signed acknowledgment forms are a critical part of any new hire paperwork checklist, serving as legal proof that an employee has received, read, and understood key company documents. These can range from the general employee handbook to more specific Non-Disclosure Agreements (NDAs) and data security policies. By obtaining a signature, employers create a clear record that essential rules, expectations, and legal obligations were communicated from day one.
How It Works
This process formalizes the employee's agreement to abide by company standards and protect sensitive information. It is not just a formality; these documents are foundational for enforcing policies and defending against potential legal disputes.
- During Onboarding: New hires are typically presented with these forms as part of their initial paperwork packet, either physically or digitally.
- Review and Signature: The employee is given time to review the documents, ask questions, and then provide their signature to acknowledge receipt and understanding. The signature confirms they are aware of policies regarding conduct, confidentiality, and more.
This step is vital for setting clear expectations and establishing a mutual understanding of the employment relationship.
Actionable Tips for Acknowledgment Forms
To manage acknowledgment forms effectively and ensure they serve their legal purpose, consider these best practices:
- Use Digital Signature Platforms: Tools like DocuSign or Adobe Sign streamline the collection and storage of signed forms, creating an easily accessible and auditable digital trail. This is especially useful for remote teams.
- Keep Forms Separate: Do not bundle all acknowledgments into one monolithic document. Use separate forms for the employee handbook, NDA, and data security policies to ensure clarity and specific consent for each.
- Consult Legal Counsel: Have an employment attorney review all legally binding forms, especially NDAs and confidentiality agreements, to ensure they are enforceable and compliant with state laws.
- Provide Plain-Language Summaries: For complex legal documents, offer a simple, one-page summary that explains the key points in straightforward terms. This helps ensure genuine understanding before an employee signs.
8-Item New Hire Paperwork Comparison
| Document / Form | Implementation complexity | Resource requirements | Expected outcomes | Ideal use cases | Key advantages |
|---|---|---|---|---|---|
| W-4 Form (Employee's Withholding Certificate) | Low–Moderate: single standardized form but requires tax understanding | Payroll integration, employee guidance, periodic updates | Accurate federal income tax withholding from paychecks | All employees at hire and when personal/tax circumstances change | Direct payroll integration; IRS guidance; essential for federal tax compliance |
| Direct Deposit Authorization Form (ACH Form) | Low: simple authorization but requires bank validation | Bank account details (routing/account), ACH-capable payroll system, optional voided check | Electronic deposits to bank accounts; fewer paper checks and faster payments | Payroll, reimbursements, contractor/vendor payments | Faster payments; cost savings; NACHA standardization; voided check verification |
| I-9 Form (Employment Eligibility Verification) | High: legal timelines, original-document inspection, E-Verify integration optional | Original identity/work-authorization documents, trained HR, secure retention | Verified employment eligibility and documented legal compliance | All U.S. hires, mandatory for employers (critical for government contractors) | Legal protection; standardized verification; audit-ready records |
| W-9 Form (Contractor Tax Information) | Low: one-page, straightforward | Collection of TIN (SSN/EIN), secure storage, occasional TIN matching | Proper 1099 reporting and backup-withholding protection | Independent contractors, vendors, freelancers | Simple to collect; reduces backup-withholding risk; supports IRS reporting |
| State Tax Withholding Forms (State W-4 Equivalents) | Moderate–High: varies by state; multi-state complexity | State-specific forms, payroll software support, HR state-tax knowledge | Correct state tax withholding and avoidance of state penalties | Employees working in states with income tax; multi-state employers | Ensures state compliance; prevents state-level tax liabilities |
| Emergency Contact and Beneficiary Forms | Low: simple collection but requires secure handling and updates | Employee contact info, benefits systems, secure storage, periodic reminders | Faster emergency response and correct benefits/insurance payouts | All employees; benefits enrollment and safety planning | Protects employee welfare; ensures accurate beneficiary distributions |
| Bank Account Verification (Voided Check or Bank Statement) | Low: simple verification step with routing/account validation | Voided check or bank statement, routing validation tools, secure file handling | Reliable direct-deposit setup with reduced payment errors | Direct deposit setup for employees, contractors, and vendors | Universal acceptance; rapid account verification; fewer deposit failures |
| Signed Acknowledgment Forms (Handbook, NDA, Confidentiality) | Low–Moderate: many documents; legal review often recommended | Policy documents, signature platform (digital/wet), legal counsel for review | Documented employee receipt/acknowledgment of policies; legal evidence | All hires; regulated industries; roles handling IP or sensitive data | Legal proof of notice; reduces liability; enforces confidentiality and policy compliance |
From Paperwork to Productivity: Finalizing Your Onboarding Workflow
Navigating the new hire paperwork checklist is far more than an administrative hurdle; it is the first tangible step in building a strong, professional relationship with your new employee. A well-organized onboarding process sets a positive tone, communicates company competence, and ensures a seamless transition from candidate to productive team member. By systematically addressing each document, from the foundational I-9 and W-4 forms to state-specific tax documents and internal policy acknowledgments, you lay the groundwork for legal compliance and operational efficiency.
The key takeaway is that this process is a strategic opportunity, not just a procedural requirement. A clear, structured approach mitigates common pitfalls like missed deadlines for Form I-9 verification or incorrect payroll setup due to incomplete direct deposit information. When employees understand their responsibilities and have the tools they need, they feel supported from their very first day. This proactive management of the new hire paperwork checklist minimizes future administrative headaches and solidifies your company's reputation as an organized and professional place to work.
Actionable Next Steps for a Flawless Onboarding Workflow
To transform this knowledge into a powerful system, focus on these final steps:
- Digitize and Centralize: Move away from scattered paper forms. Utilize an HRIS or a secure cloud-based folder to create a digital onboarding kit. This ensures all documents are in one place, easily accessible for audits, and simple for new hires to complete remotely.
- Create a Master Checklist: Use the information from this article to build your own comprehensive new hire paperwork checklist. Customize it with state-specific forms, company policies, and role-specific agreements. Add columns for deadlines, who is responsible (HR or employee), and completion status.
- Provide Clear Instructions: Do not assume new hires know what a voided check is or how to fill out a state tax form. For each document, provide a brief, clear explanation and link to official resources (like the IRS website for the W-4). This simple step dramatically reduces errors and follow-up questions.
- Embrace Modern Solutions: Recognize that traditional requirements, like providing a physical voided check for direct deposit, are outdated for many new hires. Proactively offer digital alternatives. Services that generate compliant voided checks online are invaluable for accommodating a modern workforce and speeding up payroll setup.
By implementing these strategies, you convert the onboarding process from a reactive scramble into a proactive, welcoming experience. This efficiency allows you and your new employee to focus less on paperwork and more on what truly matters: integration, training, and contributing to the company's success. An impeccable onboarding workflow is the first and best signal to a new team member that they have made the right choice in joining your organization.
Ready to eliminate the friction of setting up direct deposit? For new hires who don't have a checkbook, VoidedCheck.org provides an instant, compliant solution. Generate a valid voided check online in seconds to complete your new hire paperwork checklist and ensure a smooth payroll setup.
Related Articles

How to Get a Cancelled Check Your 2026 Guide
Need to know how to get a cancelled check for direct deposit or proof of payment? Discover easy methods from online banking to digital alternatives.

Use A Check Creator Online To Void Checks
Need a voided check for payroll? Use a check creator online to generate a secure, compliant voided check in minutes. Get started now and skip the bank trip.

7 Onboarding documents for new hires You Should Know
Discover the top 7 onboarding documents for new hires strategies and tips. Complete guide with actionable insights.